Register and Manage Models in SageMaker Model Registry
In this section, we will register the trained model to the SageMaker Model Registry for version management, metadata tracking, and future deployment. This is an important step to make your ML pipeline repeatable, version-controlled, and deployable.
🎯 Objectives
-
Register the trained model from S3 output to the SageMaker Model Registry.
-
Attach metadata (version, data information, hyperparameters, metrics).
-
Manage model versions and approval status (Approved/Pending/Rejected).
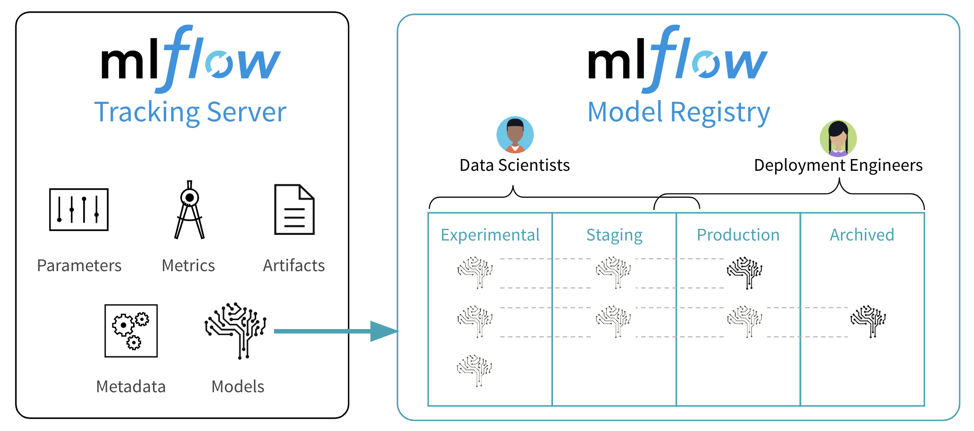
🧠 1. Overview of SageMaker Model Registry
SageMaker Model Registry is a ML model lifecycle management service that allows you to:
-
Store and manage model versions over time.
-
Attach model information such as metrics, hyperparameters, training data.
-
Control the model approval process before deployment.
-
Integrate directly with SageMaker Endpoint to deploy production models.
📊 Architecture after adding Model Registry:
📁 2. Access and create Model Package Group
- Go to AWS Management Console → select Amazon SageMaker.
- In the left menu, select Model registry → Model package groups.
- Click Create model package group.
Fill in the information:
- Name:
ml-pipeline-model-group - Description: “Model group for ML pipeline workshop”
- Click Create model package group.
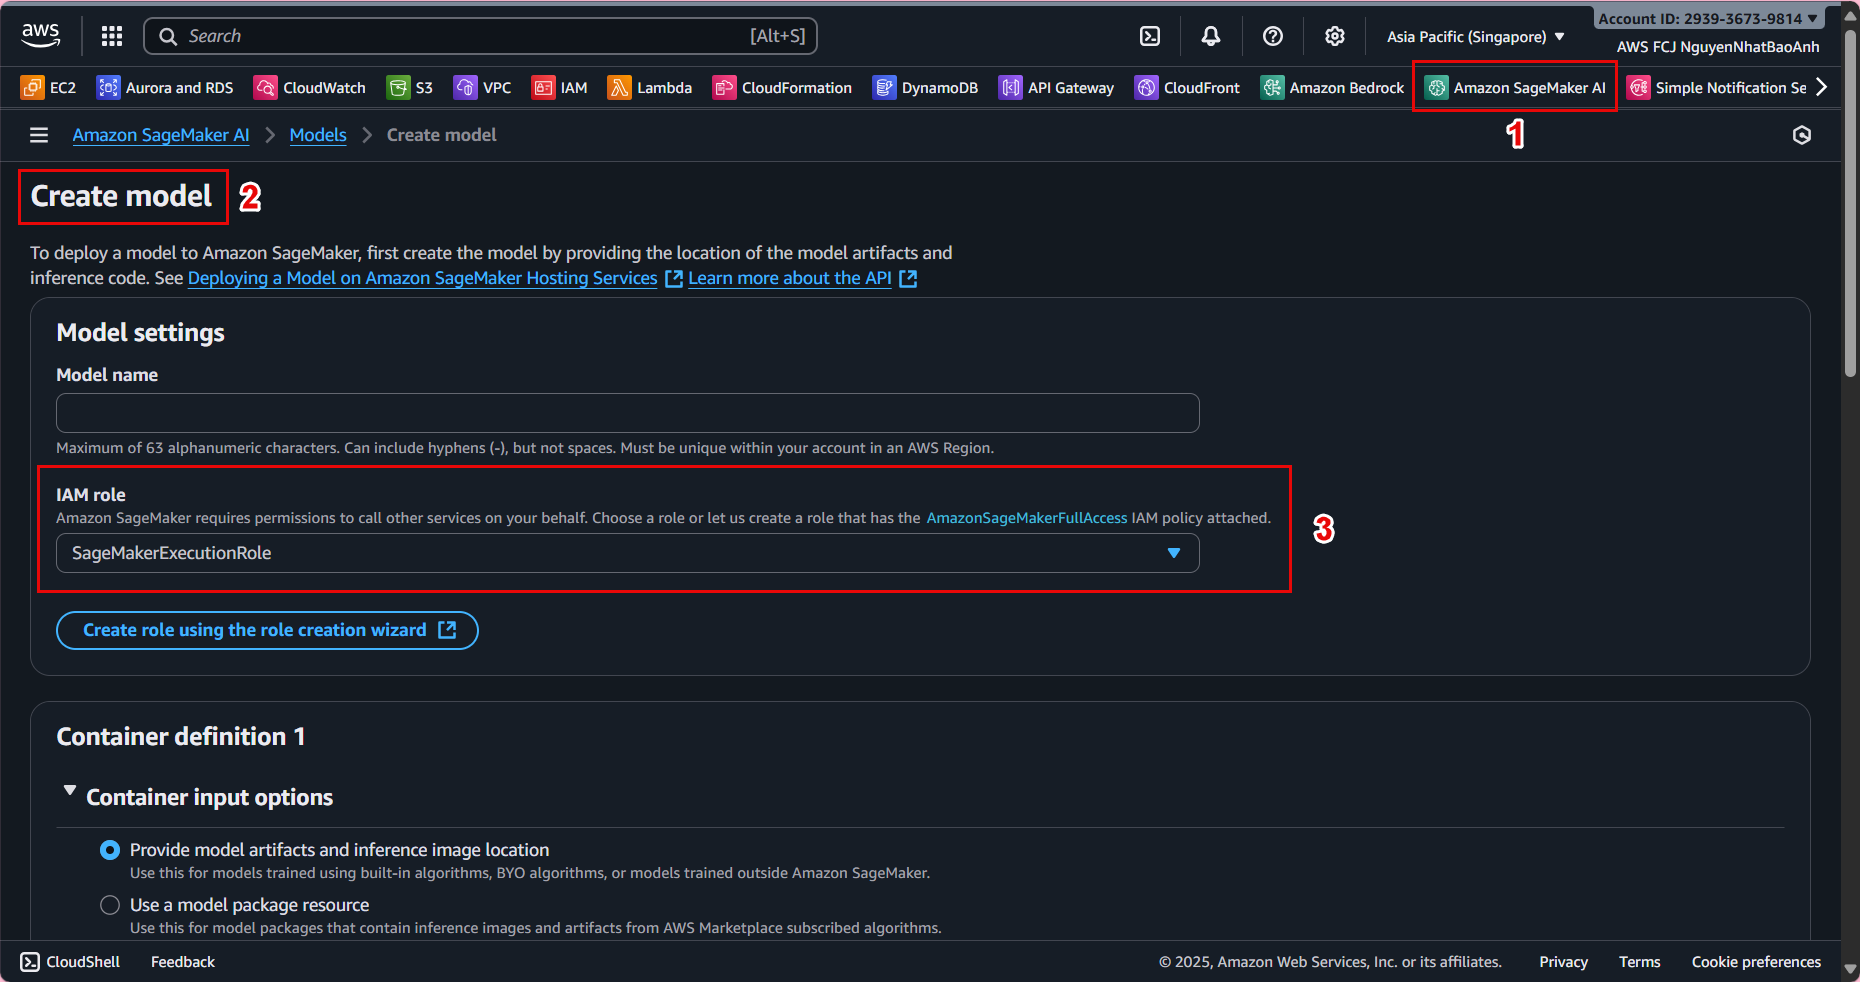
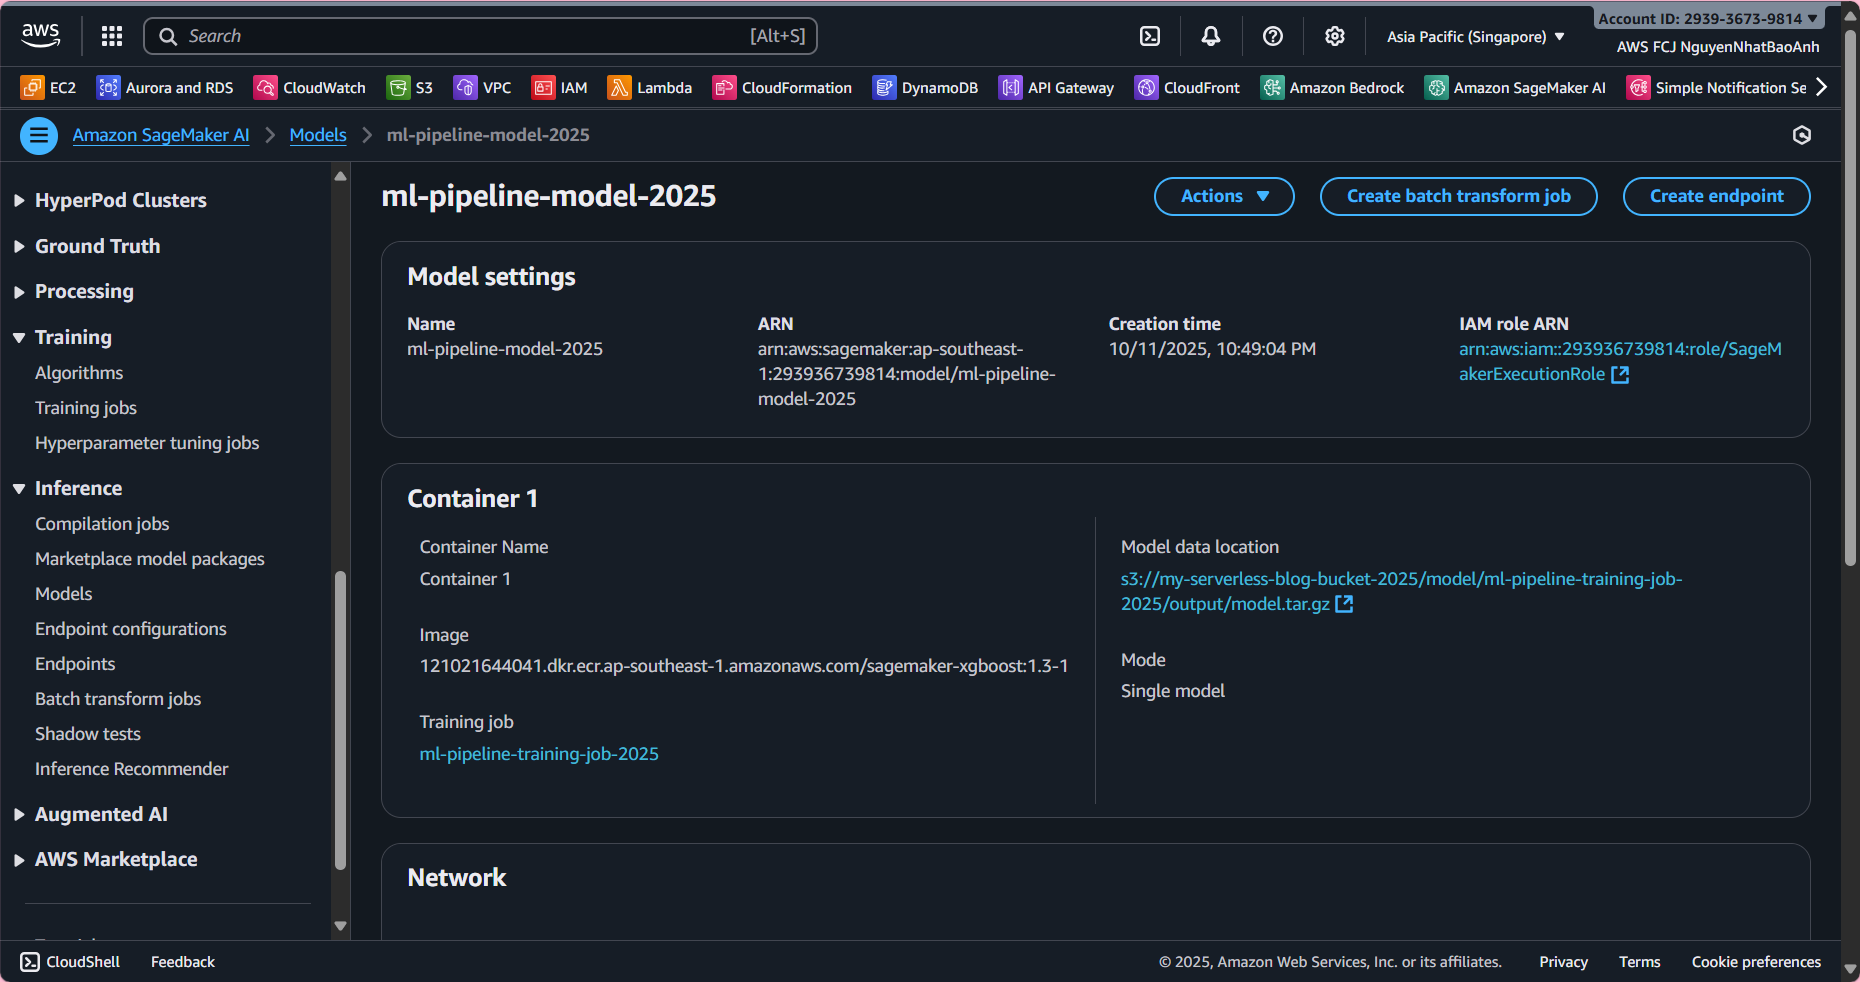
📤 3. Register the trained model
Now we will create a Model Package from the saved model after training (model.tar.gz) in S3.
- In Model registry → select the newly created group → Create model package.
- Configure as follows:
-
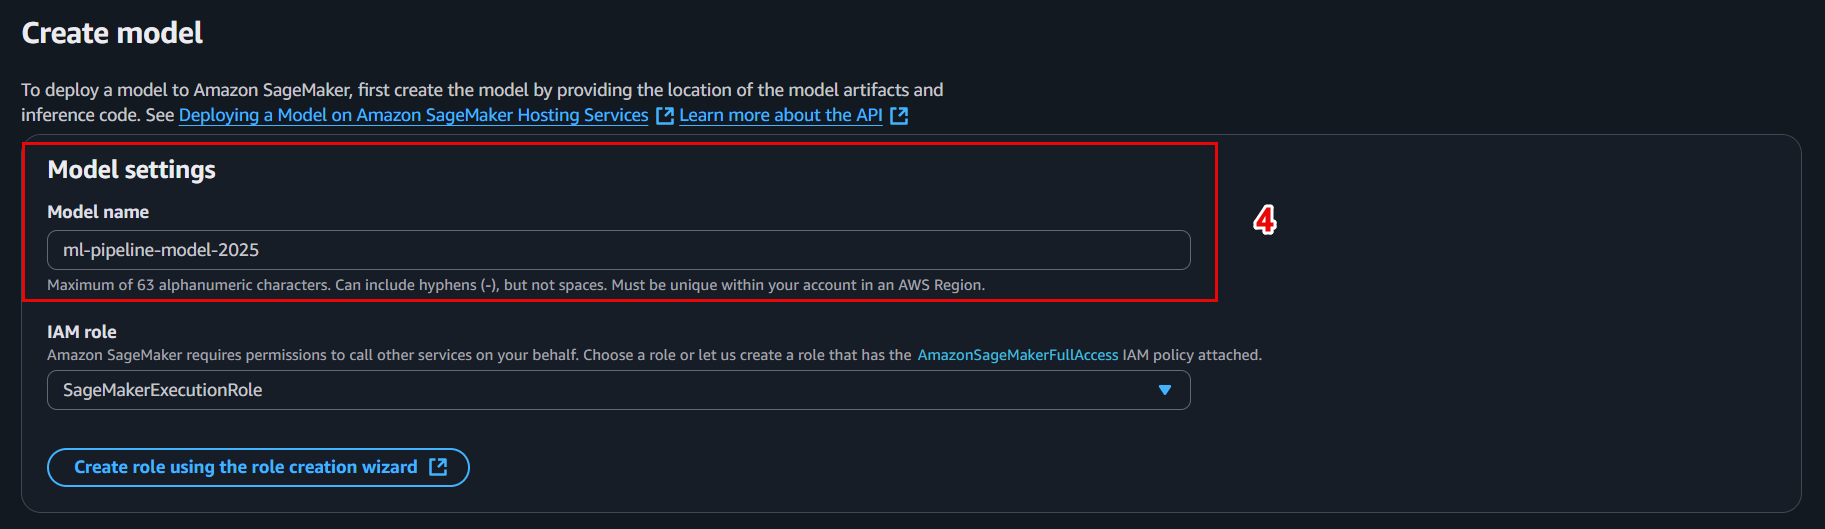
Model package name:
ml-pipeline-model-v1 -
Model location (S3): s3://ml-pipeline-bucket/model/model.tar.gz
-
Inference image URI:
-
If using built-in XGBoost: select the available container from SageMaker.
-
If custom: enter your ECR container image.
-
IAM Role:
SageMakerExecutionRole(has access to S3 and SageMaker). -
Approval status:
Pending manual approval(or Approved if ready to deploy).

🧪 4. Attach metadata & model metrics (optional)
You can attach important information to help the ML/DevOps team understand the model:
- Training dataset version:
v1.0 - Algorithm:
XGBoost - Accuracy:
0.912 - Hyperparameters: learning_rate, max_depth, n_estimators
- Created by:
Lambda Preprocessing Pipeline
📌 This is useful when you have multiple models and need to choose the best one to deploy.
✅ 5. Manage model versions
Every time you create a new Model Package, it becomes a version in the group:
| Version | Model Name | Accuracy | Status | Approval |
|---|---|---|---|---|
| 1 | ml-pipeline-model-v1 | 0.912 | Completed | Approved ✅ |
| 2 | ml-pipeline-model-v2 | 0.927 | Completed | Pending 🕐 |
📈 You can update the model status from Pending → Approved once the review is complete.
🔎 6. Check the registered model using AWS CLI (optional)
If you want to automate, you can register the model using CLI:
aws sagemaker create-model-package \
--model-package-group-name ml-pipeline-model-group \
--model-package-description "ML pipeline v1 model" \
--model-approval-status Approved \
--inference-specification '{"Containers": [{"Image": "<IMAGE_URI>", "ModelDataUrl": "s3://ml-pipeline-bucket/model/model.tar.gz"}], "SupportedContentTypes": ["text/csv"], "SupportedResponseMIMETypes": ["text/csv"]}'
🧹 7. Update and control model lifecycle
-
When training a new model, simply create a new Model Package in the same Model Package Group.
-
This helps track model history and makes it easy to rollback if the new model fails.
🎯 Done
-
You have successfully registered your trained model in the SageMaker Model Registry, managing version and approval status.
-
This is an important step to keep your ML pipeline organized and make it easy to deploy models into production.