Deploy SageMaker Endpoint for Inference
In this section, we will deploy the trained model from step 5 to Amazon SageMaker Endpoint, allowing inference calls via API or Lambda function. This is an important step to turn your ML model into a service that can be used in the real world.
🎯 Objectives
- Create an endpoint from the model trained and registered in the previous step.
- Test the endpoint with sample data.
- Prepare the endpoint for integration with Lambda in the next step.
🧠 6.1 – Create a SageMaker Model from an Artifact
After training and registering the model (step 5), we will create a SageMaker Model based on that output.
- Go to SageMaker Console → Inference → Models
- Click Create model
- Configure:
- Model name:
ml-blog-model - Execution role: Select the IAM role created in the previous step (
SageMakerExecutionRole) - Container definition:
- Image:
382416733822.dkr.ecr.ap-southeast-1.amazonaws.com/xgboost:latest(or the image you used when training) - Model artifact location:
s3://ml-pipeline-bucket/model/xgboost-model.tar.gz
- Click Create model to complete.
📌 Note: The container image and artifact path must match the previously created train job.
⚙️ 6.2 – Create Endpoint Configuration
- Navigate to Inference → Endpoint configurations
- Select Create endpoint configuration
- Configuration:
- Name:
ml-blog-endpoint-config - Model name:
ml-blog-model - Instance type:
ml.m5.large(orml.t2.mediumif you want to save costs) - Initial instance count:
1
- Click Create endpoint configuration
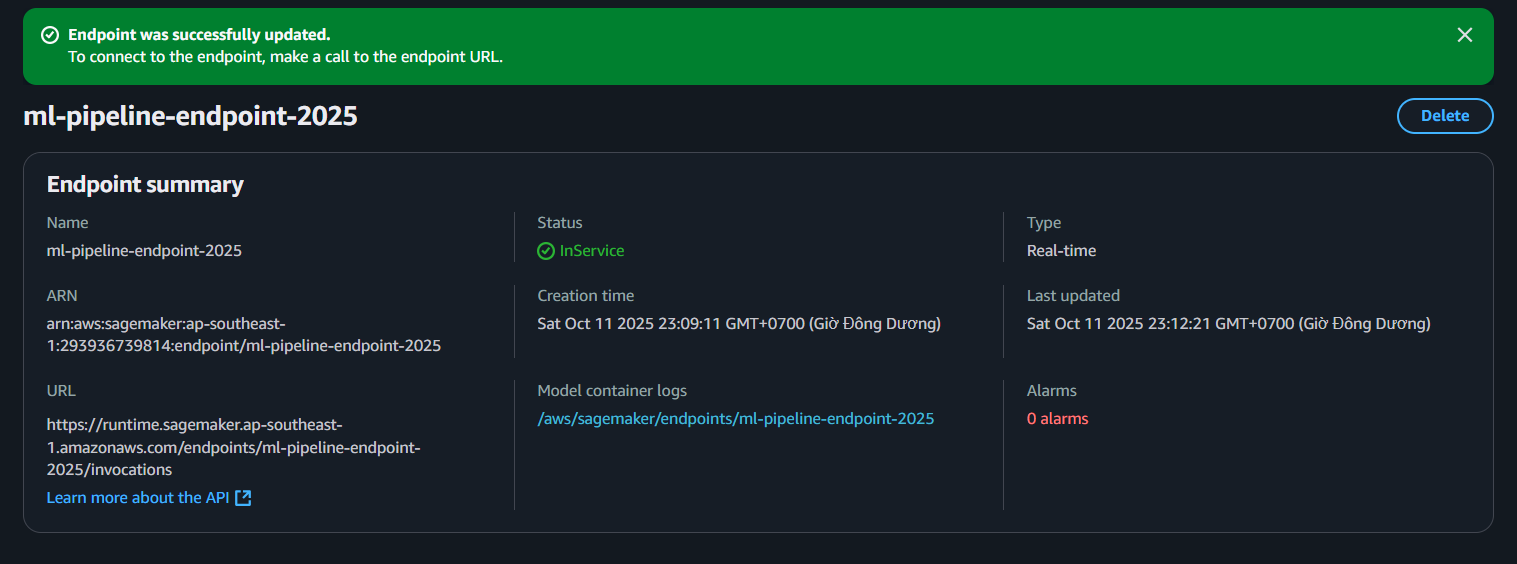
🌐 6.3 – Deploy SageMaker Endpoint
- Navigate to Inference → Endpoints
- Select Create endpoint
- Enter:
- Endpoint name:
ml-blog-endpoint - Endpoint configuration: Select
ml-blog-endpoint-config
- Click Create endpoint. The creation process will take a few minutes ⏳.
📸 Example deployment interface:
- Make sure the IAM Role has access to S3 and SageMaker (
AmazonSageMakerFullAccess,AmazonS3ReadOnlyAccess). - The endpoint must be in InService state before using inference.
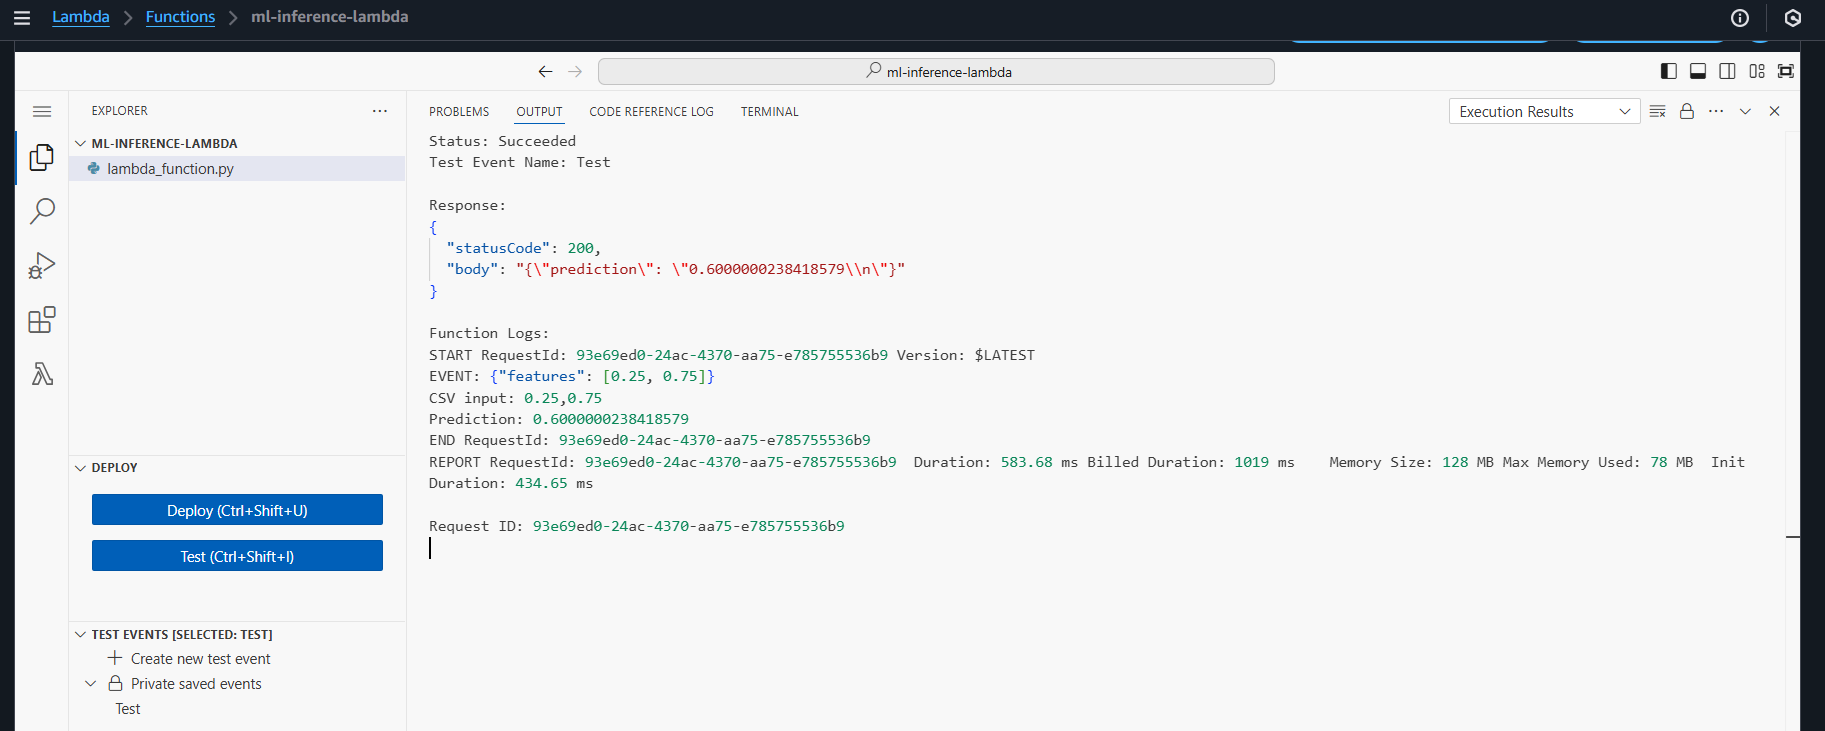
🧪 6.4 – Testing Endpoint with boto3 (Python)
Once the endpoint is in InService state, check the inference with the following Python code:
import boto3
import json

runtime = boto3.client('sagemaker-runtime')

payload = {
"features": [0.56, 0.32, 0.78, 0.12] # example input data
}

response = runtime.invoke_endpoint(
EndpointName='ml-blog-endpoint',
ContentType='application/json',
Body=json.dumps(payload)
)

result = json.loads(response['Body'].read().decode())
print("📊 Predicted result:", result)
✅ The result will return the predicted value (e.g., 1 or 0 for a classification model).
.
📊 6.5 – Endpoint Monitoring with CloudWatch
Go to CloudWatch → Logs to view the inference log. Monitor metrics such as:
- Invocations
- Invocation4XXErrors
- ModelLatency
This helps evaluate model performance in production environments.
📌 You can enable Auto Scaling for the endpoint by using Application Auto Scaling to automatically scale up/down the number of instances based on inference traffic.
✅ Done
You have successfully deployed a SageMaker Endpoint from the trained model.